Rho offers a powerful feature for automating your accounting processes: Advanced Mapping Rules. This functionality allows you to streamline your accounting by setting up rules that automatically assign multiple attributes to transactions based on specific conditions.
This guide will walk you through how to configure your account and attribute mapping so that you can save time closing your books as we automatically map attributes to your records.
Here is a video walkthrough:
Before you can set up mapping rules, you have to enable direct integration between Rho and your accounting software. See full instructions below:
IMPORTANT: Ensure all necessary accounts (e.g., credit, checking, and other accounts) are created in your accounting software.
Once all the required accounts are created, click Refresh in the top right corner of the Accounting tab for the new data to appear in Rho. This can sometimes take a few minutes.
Understanding Advanced Mapping Rules
Advanced Mapping Rules enable you to define conditions under which multiple transaction attributes, such as location, department, class, and customer, are automatically assigned. This eliminates the need for creating multiple individual rules for each attribute, significantly reducing manual effort and enhancing automation. For example, with one rule, you can define that if the vendor is Starbucks, then the location is New York, the department is Marketing, the class is Social, and the customer is Jack.
Account Mapping connects any Rho account (Card, Checking, Treasury, or Accounts Payable) to an existing or newly created Chart of Accounts (CoA) in any accounting software. As a result, all transactions associated with that Rho account are automatically transferred to the corresponding CoA in the accounting software.
Getting Started with Mapping Rules
To create mapping rules in Rho, follow these steps:
- Sign in to your Rho account in the desktop app, navigate to and select the Accounting tab in the left-hand menu in Rho.
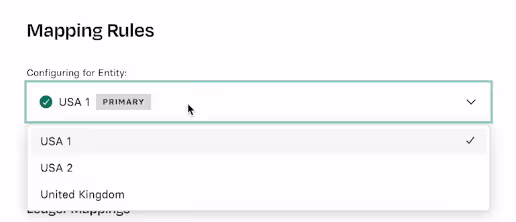
- Select Mapping Rules: then select the Entity from the list to create mapping rules. Note that all changes are saved automatically.
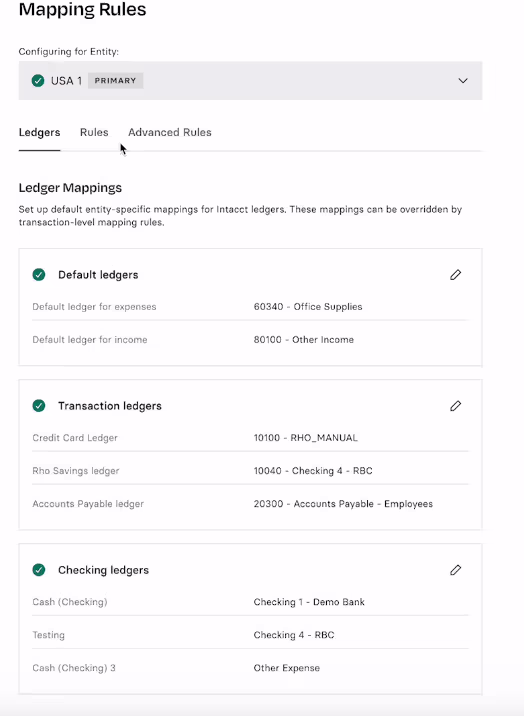
- You will now see the Ledger tab, where you set your default rules. These default rules direct all unmapped transactions to a specific Income and Expense ledger in your accounting software.
- Define the Rules: In the rule configuration interface, specify the Condition that triggers the rule. For example, if the transaction involves a specific vendor like Starbucks.
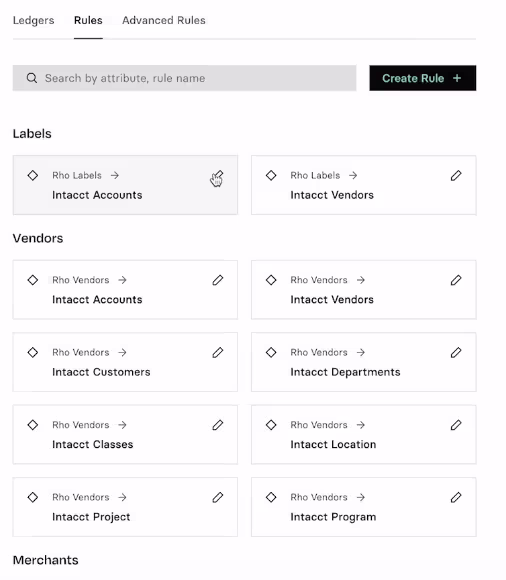
- Add or Edit Rules: Click Create Rule + to create a new rule. To edit an existing rule, click on the pencil icon.
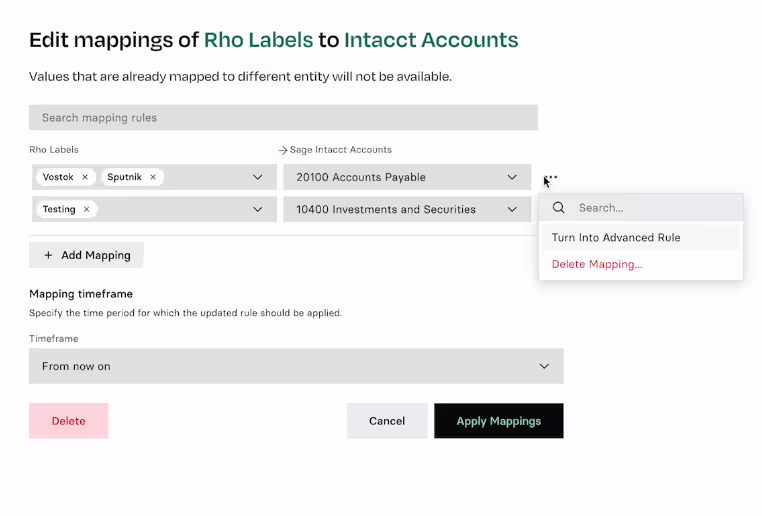
- Create Advanced Rules: You can create advanced rules from two places
- Selecting a rule, clicking the three dots, and selecting turn into the advanced rule.
- Navigate to the Advanced Rules tab, and click on Create Rule +.
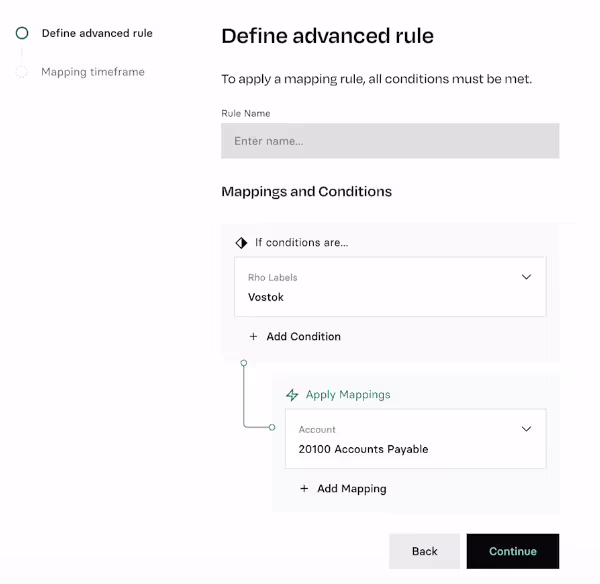
- Define Advanced Rule: You can add conditions that have to be met for something to be input, or a single condition has to be met for many inputs
- Under Mapping and Conditions, list the multiple attributes that should be automatically assigned when the condition is met. For instance, you can set the location to New York, the department to Marketing, the class to Social, and the customer to Jack, all within a single rule.
- Complex Rule Priority: Remember, in scenarios where multiple rules could apply to a transaction, Rho prioritizes the more complex rule. This ensures that the most detailed and relevant data is captured for your accounting needs.
- Once you've defined your rule, click on Continue.
- Specify the Timeframe: If necessary, define the Timeframe during which the rule should be active. This ensures that the rule only applies to transactions within a specific period.
- Save the Rule: After configuring the condition(s) and action(s), click Create & Apply Mappings. The rule will now automatically apply the specified attributes to transactions that meet the condition(s) within the defined timeframe.
Mapping Rules for your Attributes
Here is a list of the various Rho Attributes you can map to your Accounting Software. See the descriptions below.
- Departments: Departments in Rho are used to classify transactions across your cost centers. You can create departments by project and more (e.g. assign cards, transactions, or people to budgets to help you manage your organization's expenses).
- Labels: Labels are the equivalent of classes in your accounting system. You can create custom labels to help categorize your spending and assign labels to any budget, transaction, or bill directly in Rho.
- Cards: Virtual or physical Rho cards created in your Rho account can be assigned to transactions (e.g., John Smith Card, Google Ads Card, IT SaaS Card, etc.).
- Merchants: The payee or recipient of the goods/services (e.g., Google, Uber, Smith Supplies) can be assigned to transactions.
- Merchant Categories: The classification of the payee's business by the type of goods or services provided (e.g., Taxis/Limousines, Courier Services, Electronics Store) can be assigned to transactions.
- Payees: A payee is any person or business you want to directly send money to (via ACH, Wire, or check). You can create and save payees in your Rho account.
Best Practices for Using Complex Mapping Rules
- Prioritize clarity: Ensure that the conditions and actions in your rules are clearly defined to avoid confusion.
- Review regularly: Periodically review your mapping rules to ensure they remain relevant and update them as necessary.
- Utilize the most complex rule: In cases where multiple rules could apply, Rho will prioritize the more complex rule to ensure the most detailed and relevant data is captured.


.avif)
.avif)