You can use Rho to send money via physical check to any person or business. Rho generates a physical check made out to the specified vendor and mails it to their configured address.
Steps to Send a Physical Check
- Navigate to the Banking Tab
- Click the Move Funds button to start your transfer
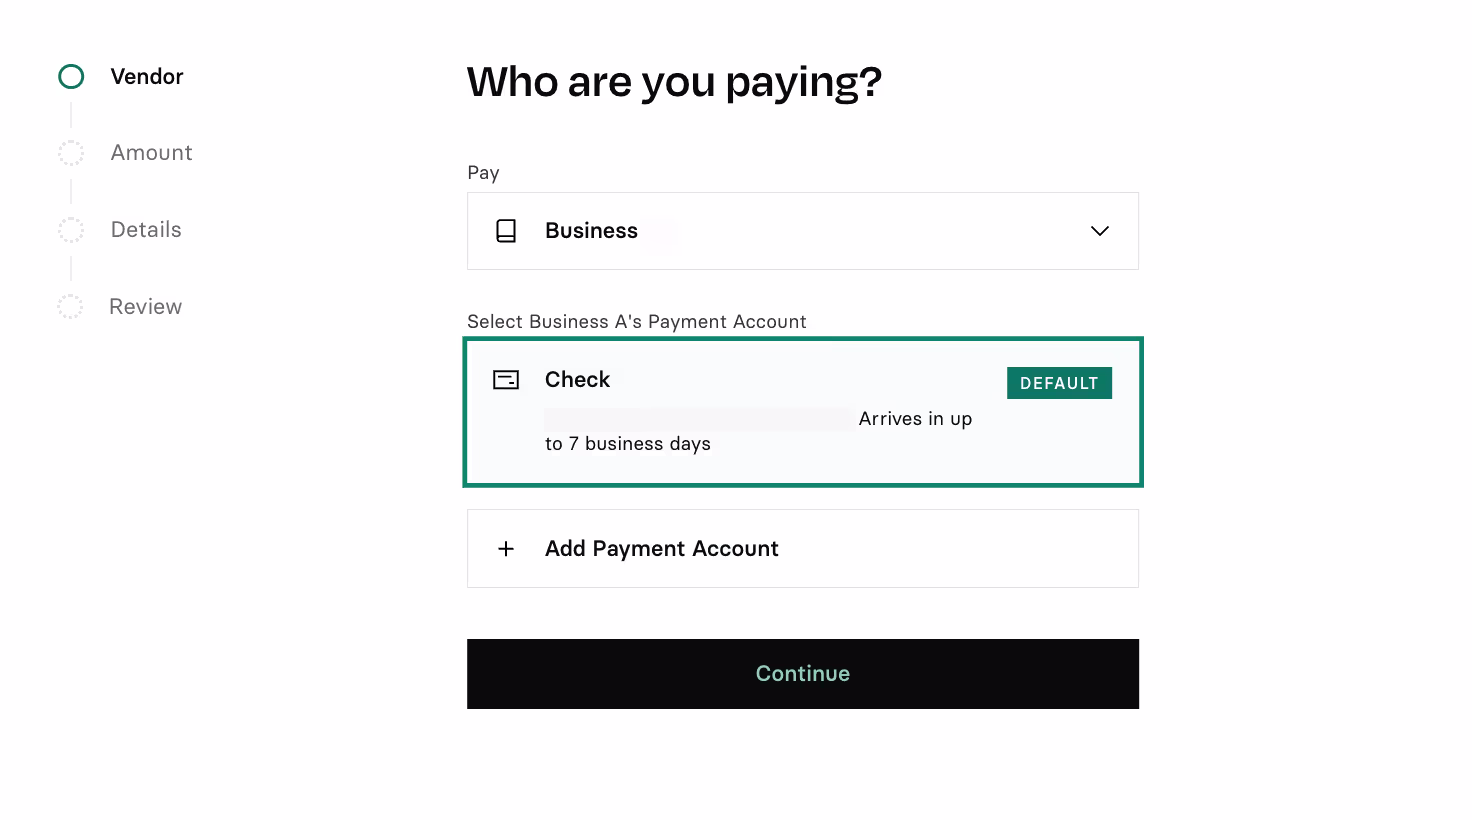
- Select the Pay option

- Choose your vendor from the list or create a new vendor.
- Select the Check Payment Method option. If you do not have the Payment Account already created, you have the option to add a new payment account.
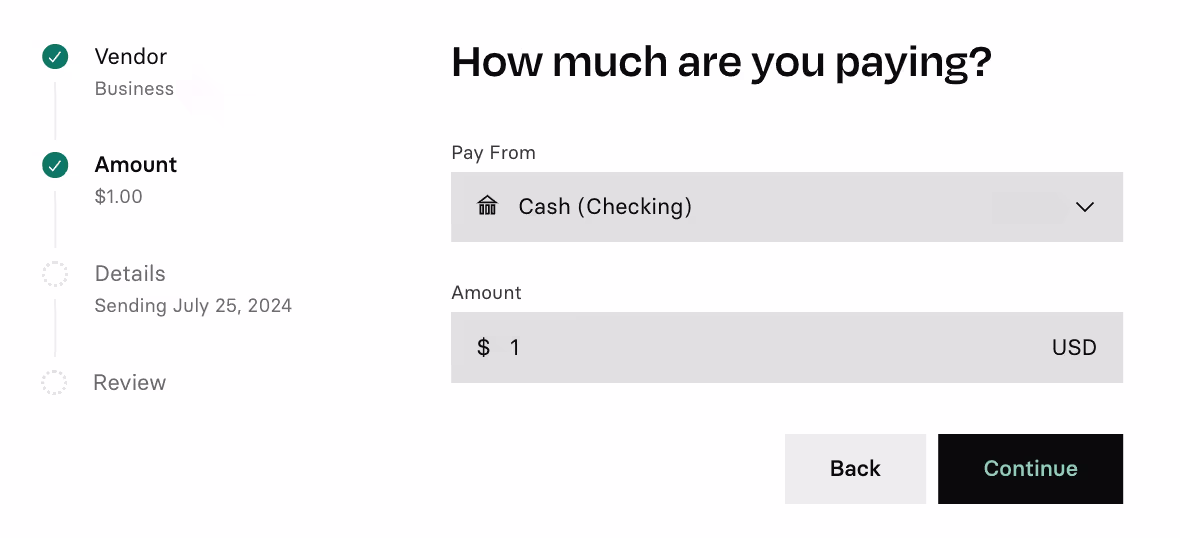
- On the Amount page, select the Desired Checking account you wish to pay from and enter the amount.
- Add Transaction Information
The following screen allows you to add additional transaction information. When you are finished, click the Continue button at the bottom of the screen.
Frequency: By default, the money is scheduled to be transferred only once (One-Time Only). To specify a recurring transfer, toggle on Schedule for a future date and select the desired frequency: one-time only (default)—every day, every week, every month, and every year.When will the transaction begin processing?: By default, the money is scheduled to be transferred immediately (Now). To specify a later date, click on the calendar field to specify the desired date after toggling on Schedule for a future date.
Note: If you schedule a recurring transfer, the Rho application bases the transfer on the date specified in the Send date field. For example, the transfer will execute at that specific date each month (Jan 20th, Feb 20th, etc.), regardless of whether it's a weekend or not, if the monthly cadence is set on a recurring transaction. Note that it will execute on that exact date, but it may not settle on that exact date, depending on the transaction type—settlement time may vary.
If February has fewer days, it will be set to the last day of Feb; for ex. choosing Jan 31 and setting a monthly recurring cadence would apply the transaction on Feb 29, Mar 31, Apr 30
Memo: Enter any notes or information to be associated with the transfer.
Add Attachment: To attach a bill or invoice to the transfer, click the Add Attachment button. A dialog window will open, allowing you to navigate to the location where the file is located and then click Open.
Add Department & Label: To assign the transfer to a specific Rho department or label, click on the relevant button and select the desired name.
.avif)
Review and Confirm: You'll be taken to a confirmation screen where you can review transfer details for accuracy. Once you are satisfied, click Confirm & Pay to finish.
Locating the check number
In Rho, there are several places where you can find the check number for your transactions. Here’s where you can view it:
- AP and Banking Transaction Windows: When you open the details of a specific transaction in either the Accounts Payable (AP) or Banking sections of your Rho dashboard, the check number is displayed within the transaction details.
- Vendor Notifications: When a check is issued and sent to a vendor, the notification sent to the vendor includes the check number. This helps vendors track and reconcile payments.
- Transaction PDF Exports: When you download the details of a transaction in a PDF, the check number is included in the export.
Important Information
- Check Expiration: Rho automatically voids any check that has not been cashed within 90 calendar days. This ensures that funds are not indefinitely held in limbo.
- Third-Party Checks: Rho does not support third-party check issuance or printing (including issuing checks from your Payroll providers (ADP, Gusto, etc).
- In order to complete Payroll checks for your employees, we suggest creating them as Vendors and issuing checks through Rho. Rho does not currently offer checkbooks, printed checks, or cashier's checks.
- International Checks: At this time, we are unable to send checks internationally.


.avif)
.avif)