In your Rho dashboard, navigate to Organization Settings by clicking the V next to your business name in the top left corner.

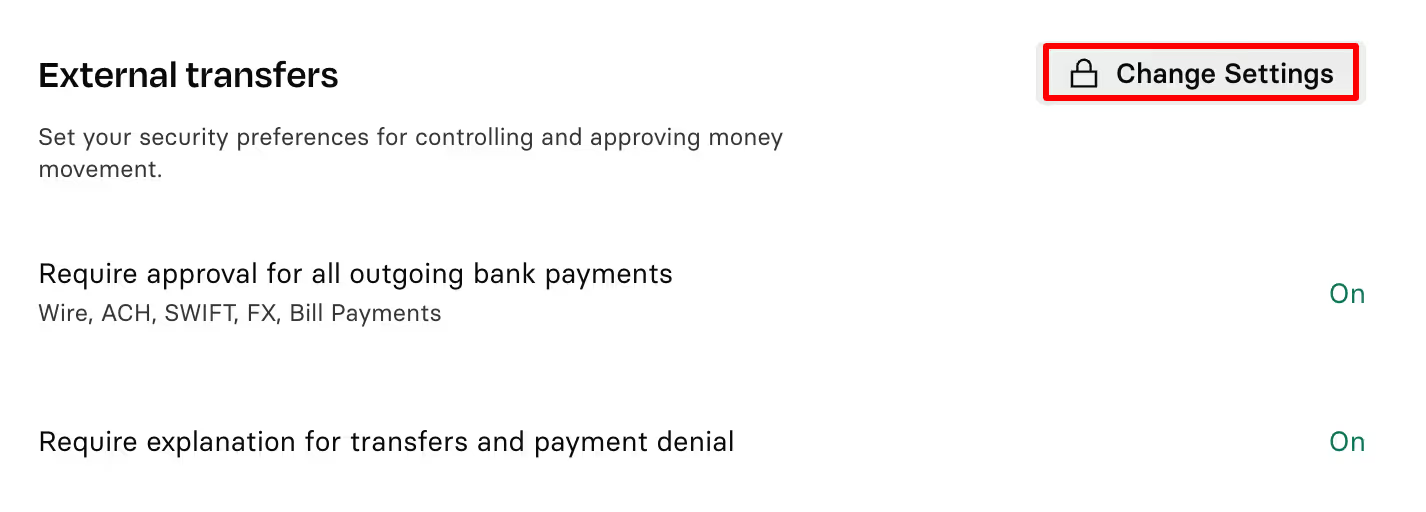
Navigate to Payment Security > External Transfers, where you’ll configure your desired settings. Click Change Settings to make changes to your approvals.

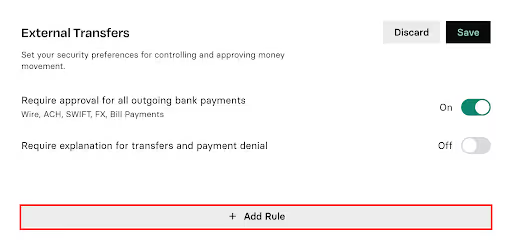
Next to the "Require approval for all outgoing bank payments", toggle to On. You can then click + Add Rule to create a custom approval rule for your organization.

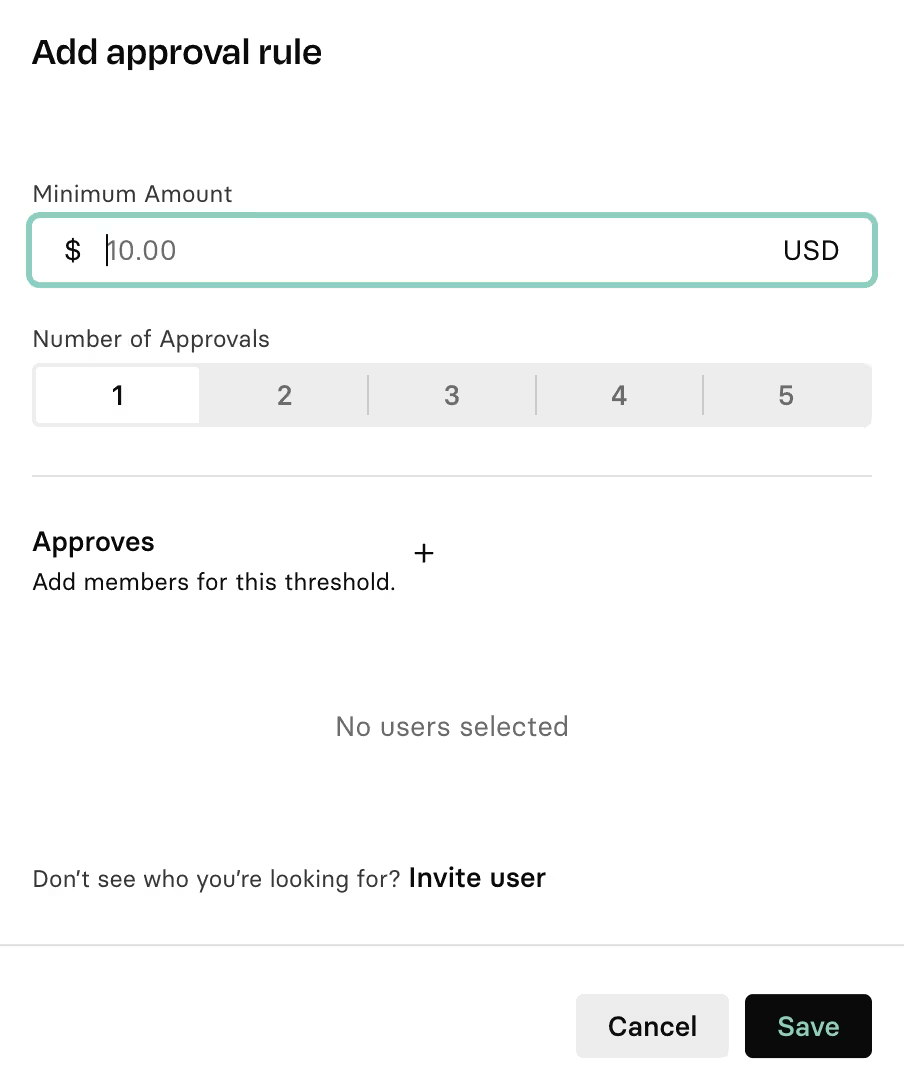
In the pop-up window, fill out the form with your desired configurations. The logic works as follows: For X amount or above, X number of approvals are required.
You can then add individuals who will act as approvers for this rule. Note that only users who are part of your organization can be added as approvers. If you don’t see the user you are looking for, you can invite them to join via the Invite User button.
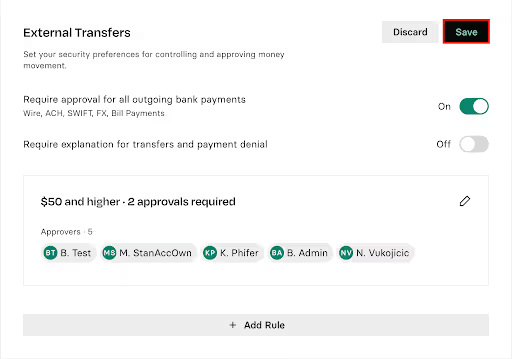
So, if you set your minimum amount as $50 and your number of approvals at 2, then any transfer of fifty dollars or more must receive two approvals from two separate people designated in the Approver list before the outgoing payment can be sent.

Click on the Save button to create the rule. Note, you can create multiple rules.
When you are finished making changes, Click the Save button in the top right corner to save and apply the rules you created.


.svg)


.avif)
.avif)