While the Rules Builder determines what additional information is required for a given expense, approvals are set by dollar amount.
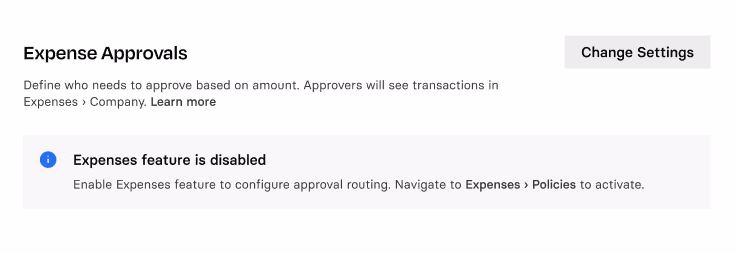
To set up approvals, go to Expenses>Settings. Scroll down to the Expense Approvals section.
You can also automatically route employee expenses directly to an employee’s manager for review and approval. To learn how to set this up, refer to this article on Direct Manager Approvals.
Please note: If Expenses is not enabled, you won’t be able to set up Approvals.
How to set up approvals
Approvals are determined by dollar amount. You can set a threshold to auto-approve expenses, such as $100 and below. You can assign multiple levels of approval for different dollar thresholds. In the example below, all Rho Card expenses will be auto-approved once the necessary information (like receipts and attendees), as specified by your business's rules in the Policy tab, is added to the transaction.

To require approvals for certain transaction amounts, you can create multiple levels of approval.
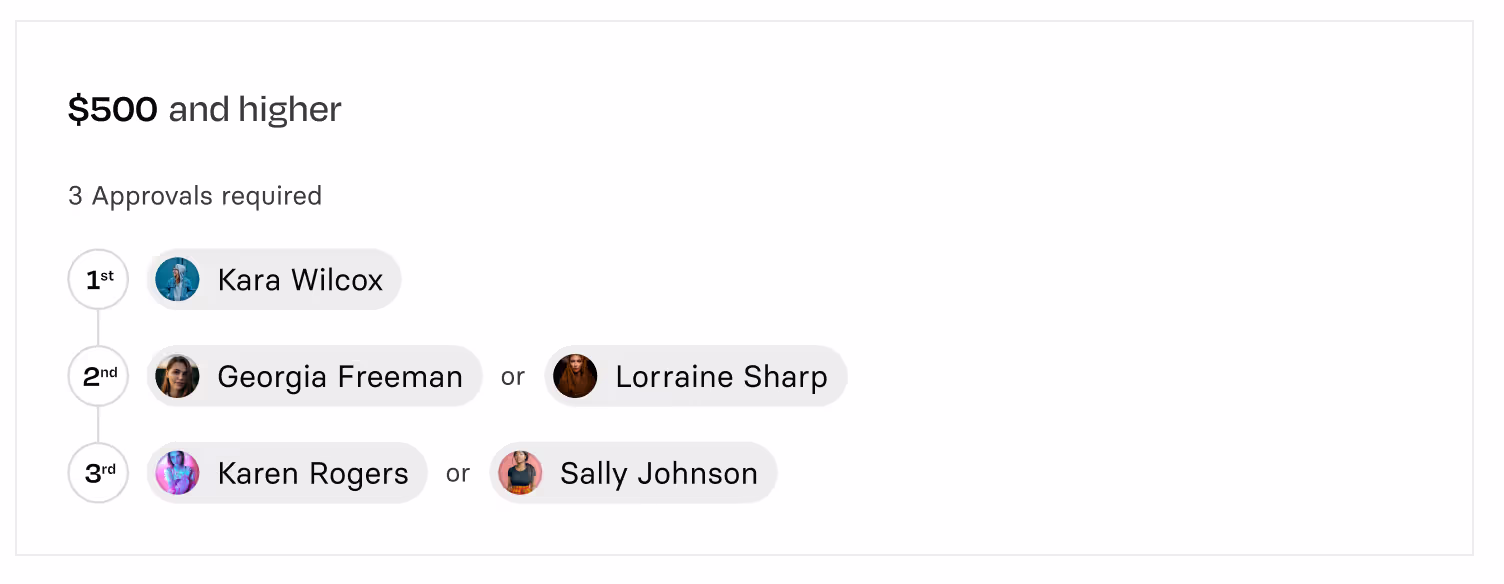
In the example below:
- All spend under $10 will be auto-approved
- For transactions over $10, a user in the first tier of approvers must approve
- For transactions over $500, both a user in the first tier and the second tier must approve
- All transactions greater than $10,000 require three tiers of approval
Note:
Once you create an approval tier, you won't be able to change the amount. In order to make changes, you can create a new tier and delete the old one.


.avif)
.avif)